
How to make paper Christmas decorations
Christmas is such an inspiring creative time, perfect for testing out your DIY skills with some beautiful decorations. This year I’ve developed four simple Christmas decorations that you can make using the most basic materials. They can all be adapted to suit your personal style and Holiday decorating colour palette.
All the templates I used to create these Christmas decorations are available as a free download. You can print them at home, or use them as inspiration to create your own template shapes.
“When we recall Christmas past, we usually find that the simplest things, not the great occasions, give off the greatest glow of happiness.”
No-Sew Paper Christmas Bunting
I love the childlike whimsy that bunting brings to any decorating project. This project is a fun twist on traditional sewn fabric bunting strings. By using paper and a lightweight twine or cord you can make a lovely bunting string that is beautiful while also being safe for kids and pets. Plus it’s a plastic free alternative to tinsel!
Materials needed for No-Sew Paper Christmas Bunting
Pretty papers (like my vintage handwriting paper printables)
Lightweight twine, cord or string
Glue stick
Scissors
How to make No-Sew Paper Christmas Bunting
You can watch a short video on how to make this project on Instagram here.
1. Using your chosen string measure the area you want the bunting to hang. In this example it is around a Christmas tree, but you could also hang the bunting on a mantle or balustrade. For a 6.5 foot tree I needed 10 meters of string.
2. Calculate the number of bunting flags your will need. The printable template has 17 flags per A4 size page. The most attractive spacing to my eye was 3 flags per 20cm. so the calculation I used for my 10 meter length of string was:
20cm x 5 = 1m
3 flags x 5 = 15 flags per meter
15 flags x 10 meters = 150 flags total
150 flags / 17 per pags = Approx 9 pages.

3. Based on your calculations print out the number of copies of the free template I’ve created. Or design your own with equal diamond shapes.
4. On the back of your template sheets print your flag designs. I used the Vintage Handwritten Documents printable. If you’d prefer to use papers that won’t fit into a printer, simply trace the template onto a thick piece of card. Then use that to trace the template shapes onto your paper.
5. Cut out all the diamond shapes. Then fold in half and glue the wrong sides together around the string.
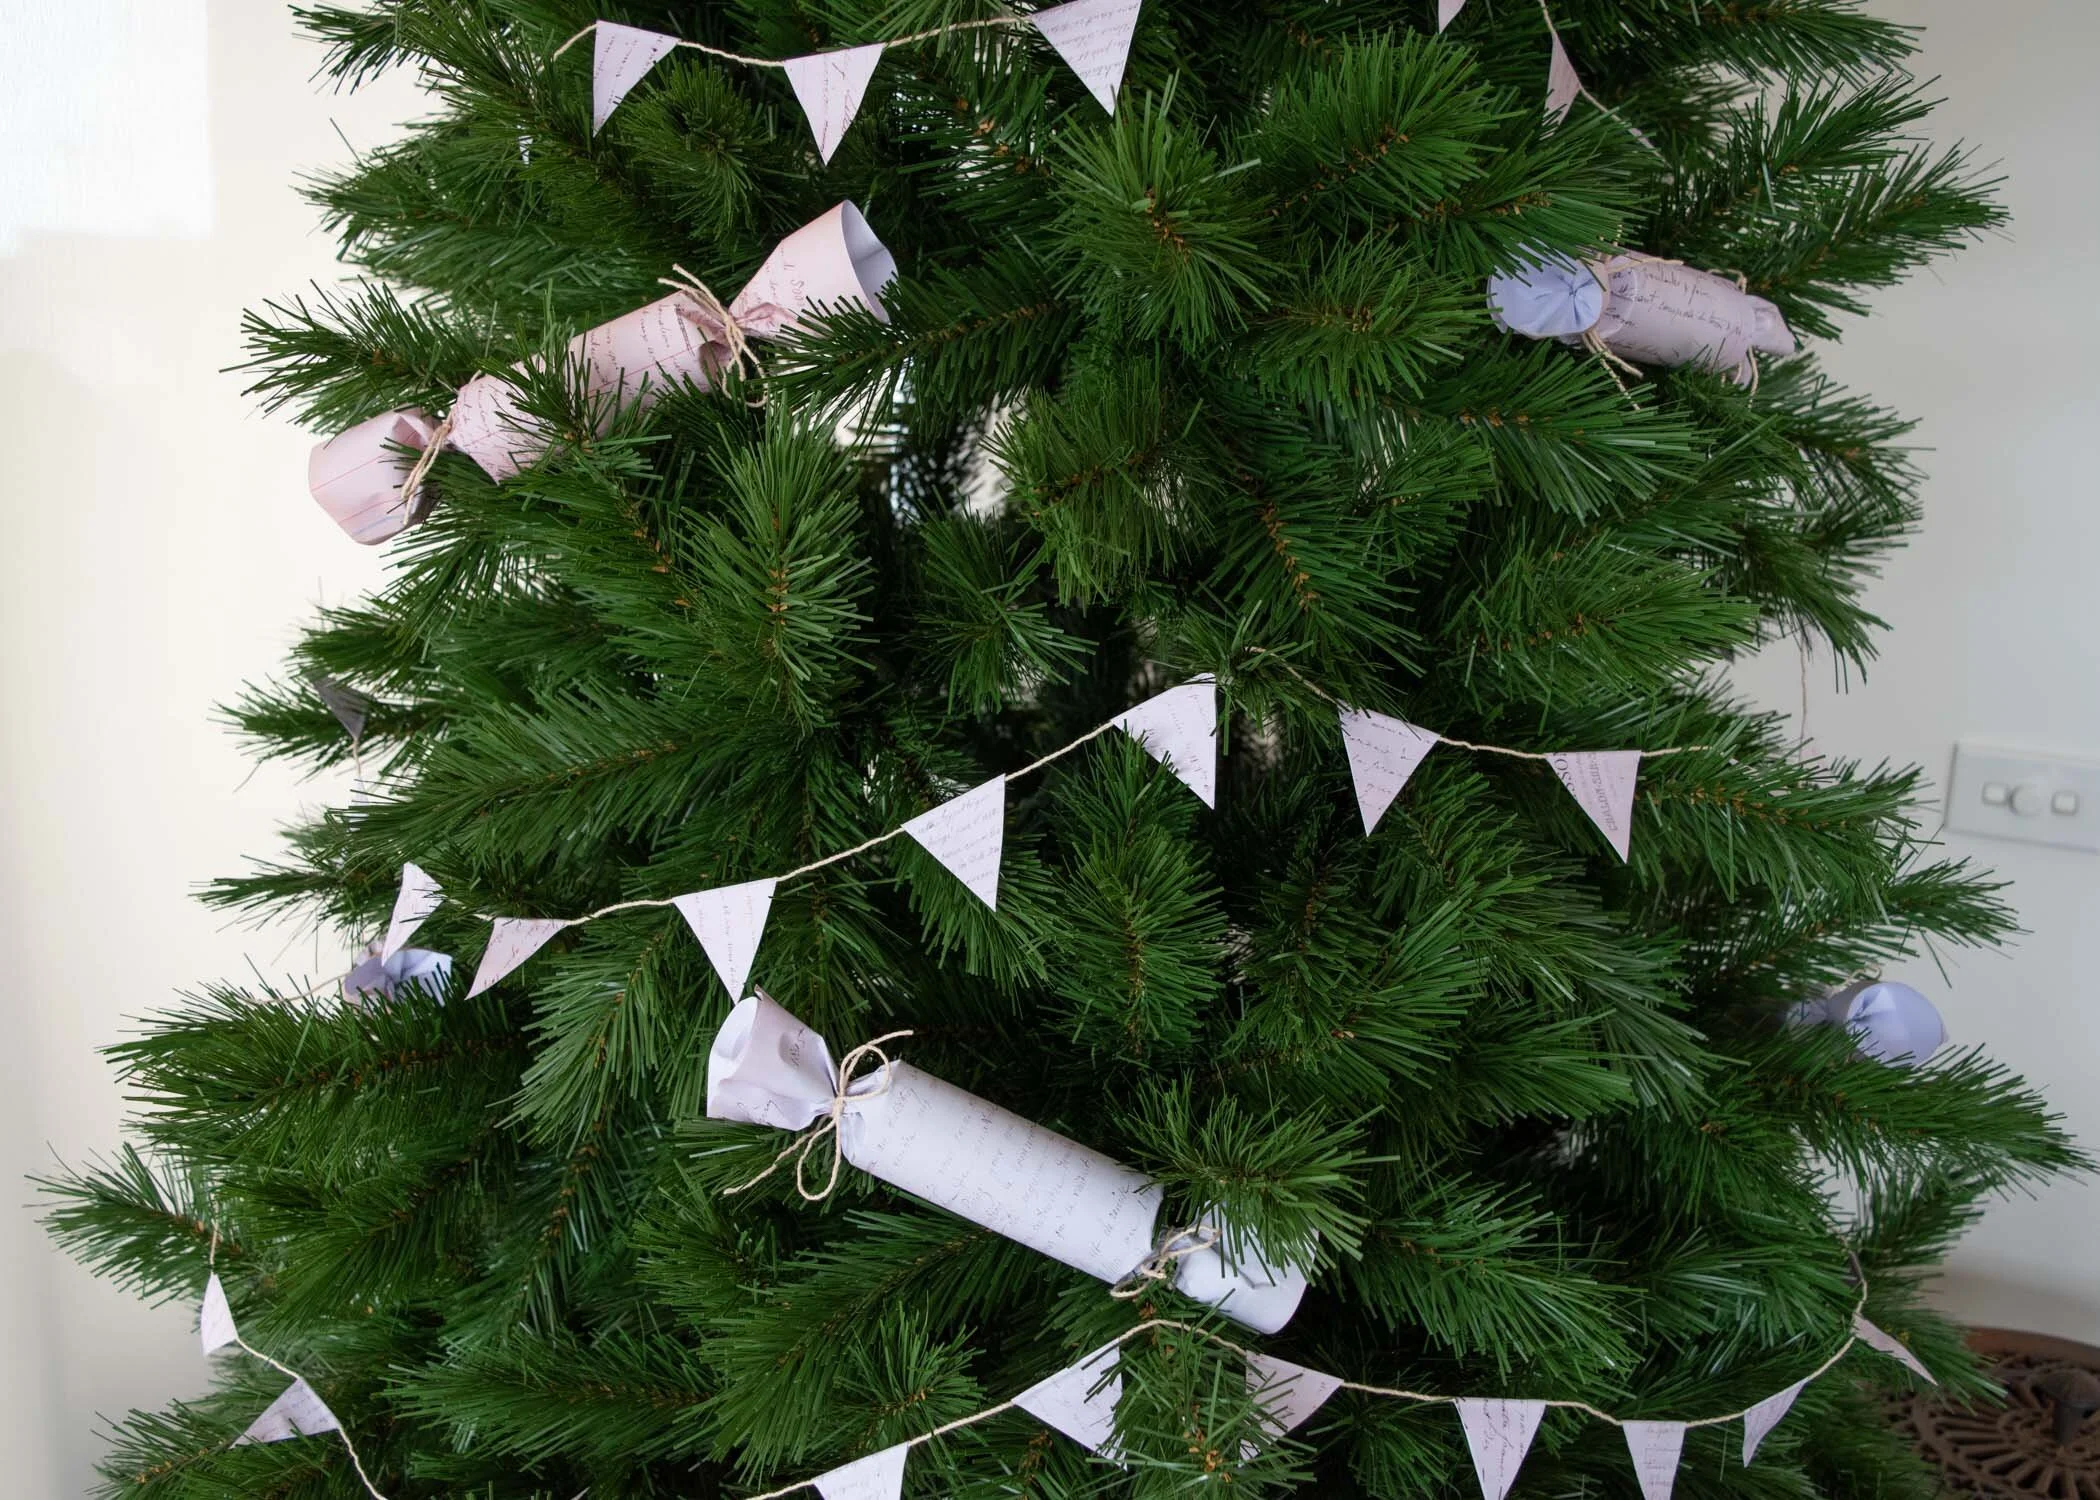
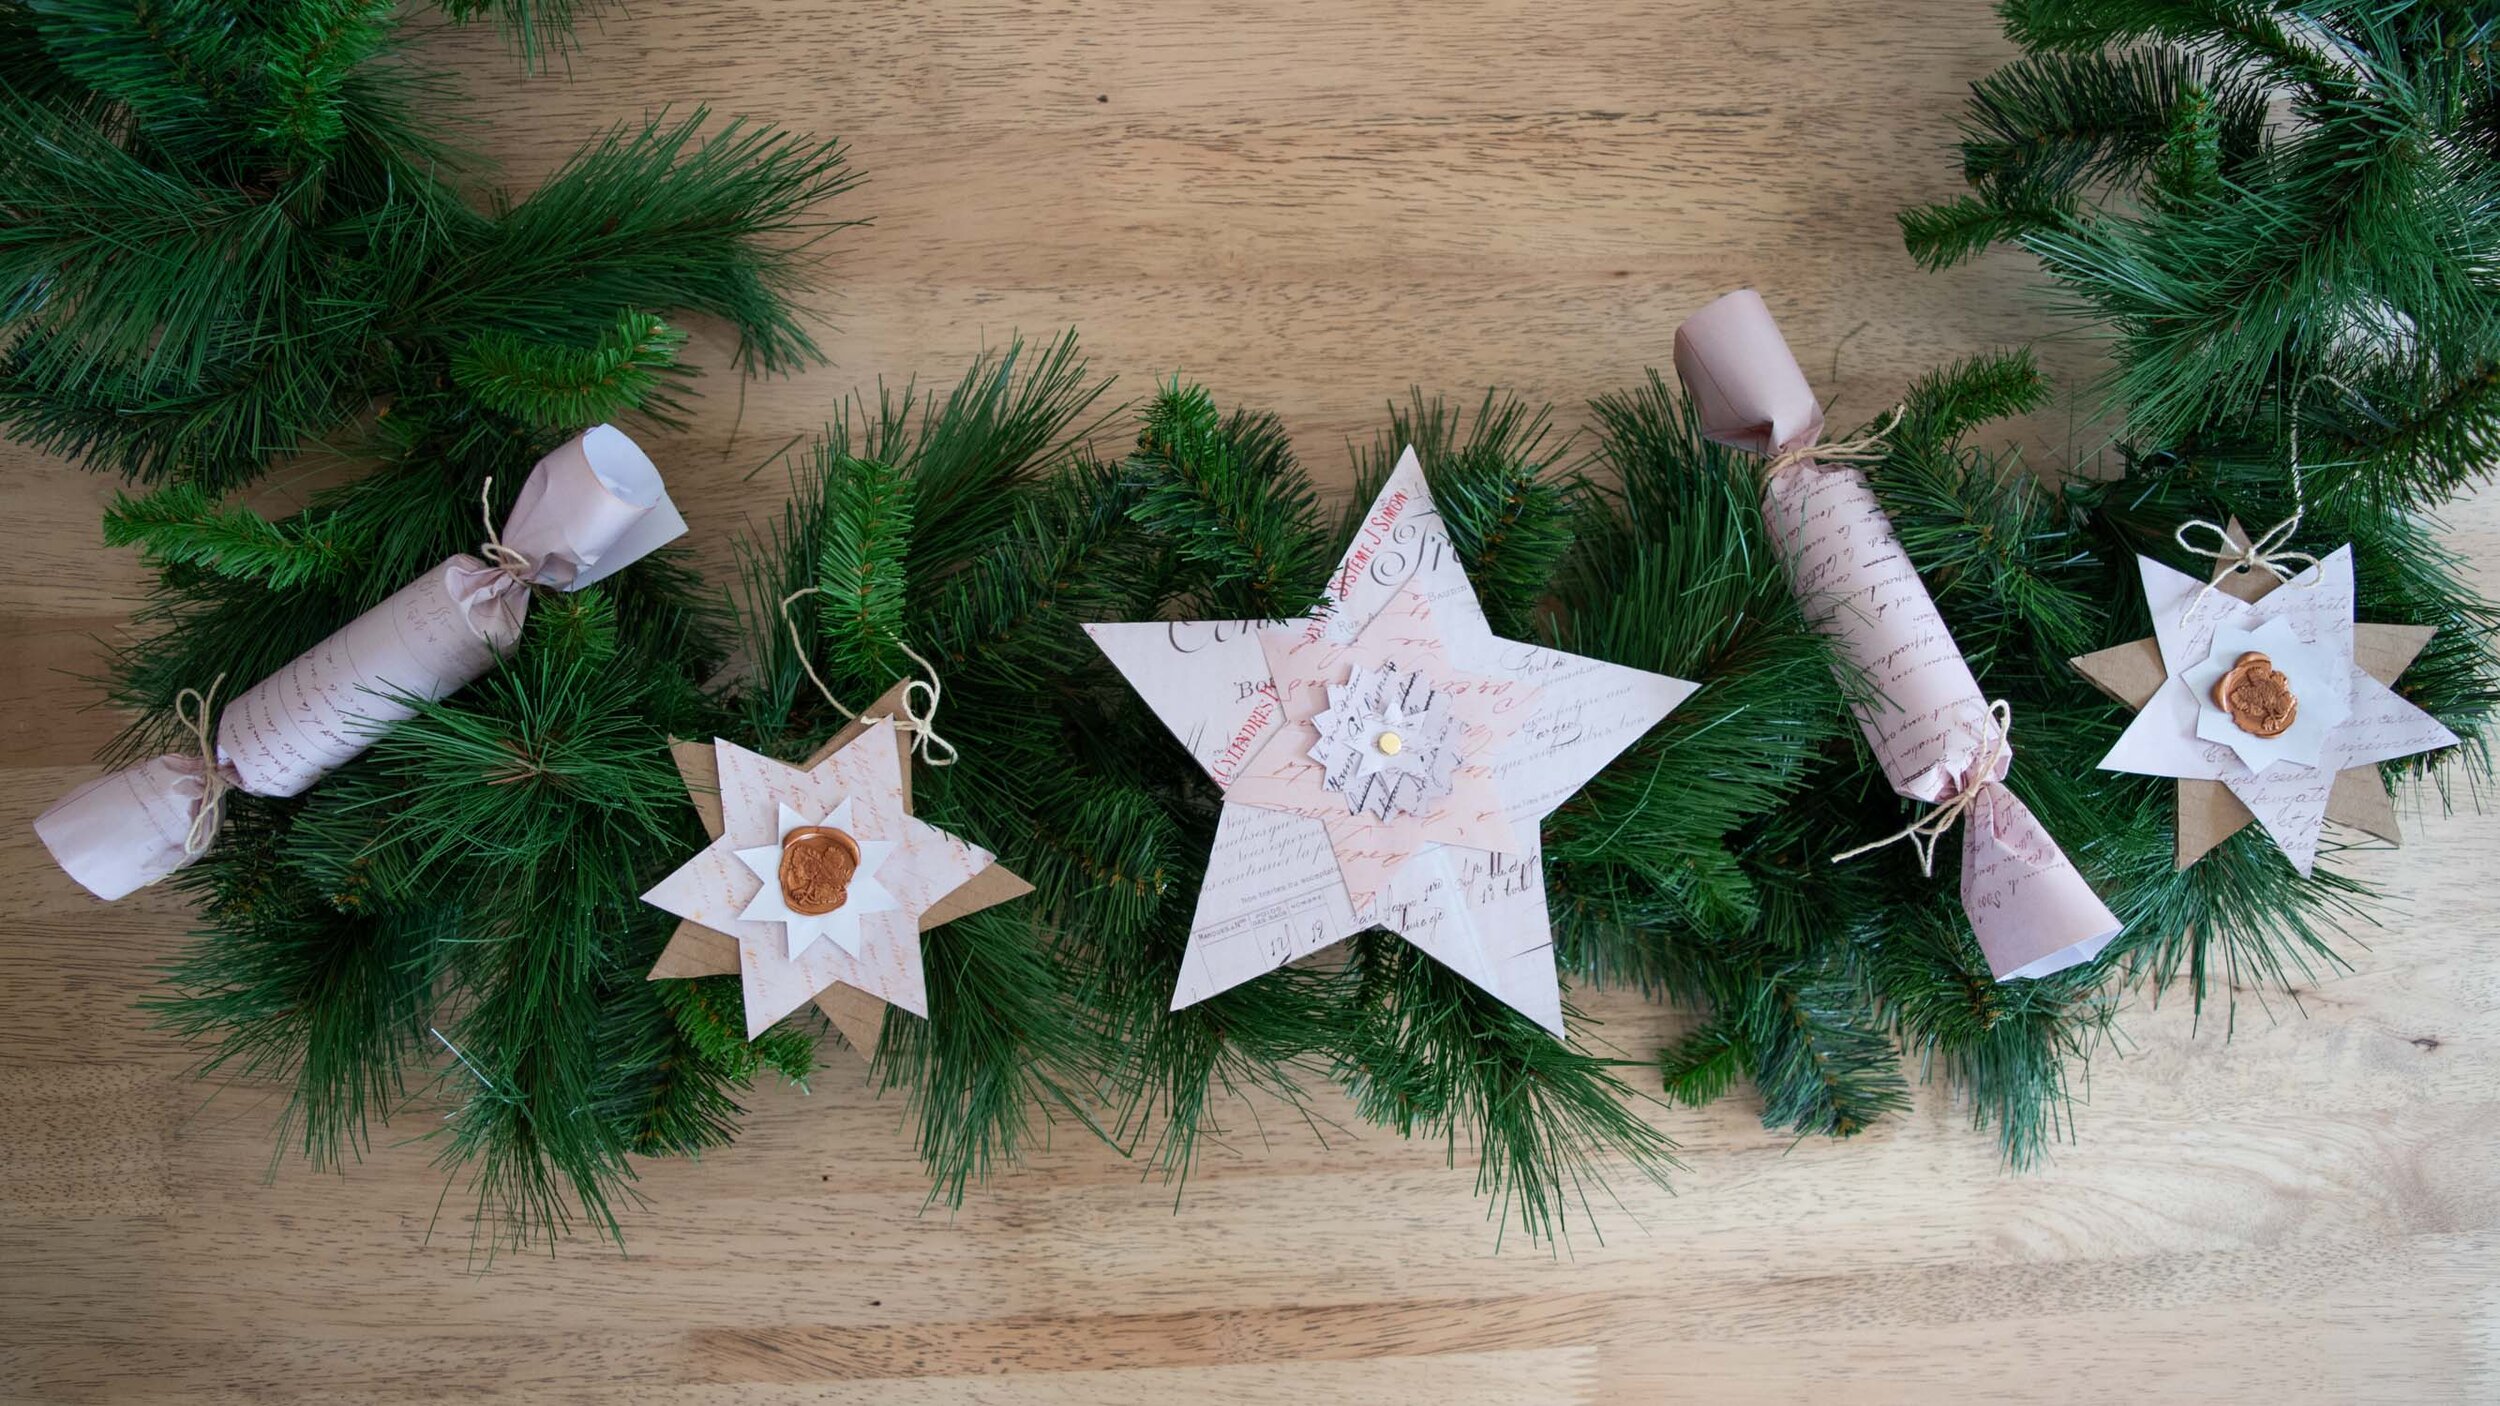
DIY Christmas Crackers
Crackers are an iconic part of Christmas decor, but it can be hard to find designs that suit your style. This version are purely decorative and aren’t meant to be pulled apart in the traditional way. However, if you’d like yours to crack when pulled the ‘snaps’ can be purchased cheaply online from sites like Etsy and Ebay. Just remember to add some cuts to the paper where it is tied to ensure it will come apart.
You can watch a short video on how to make this project on Instagram here.
Materials needed for Decorative Christmas Crackers
Pretty papers (like my vintage handwriting paper printables)
Lightweight twine, cord, ribbon or string
Glue stick
Scissors
Cardboard tubes (toilet or kitchen towel roll cores work well)
How to make Decorative Christmas Crackers
1. Cut your paper tubes down to 10cm lengths. Skip this step if using toilet rolls.
2. Trim your chosen paper sheets to approximately 20-25cm in length. If using the vintage handwritten documents printable just cut around the edge of the documents.

3. Put glue on the long edge of a sheet of paper, in the middle 10cm.
4. Roll the paper from the non-glued edge tightly around the cardboard roll, sealing with the glued edge. Allow to dry while your repeat this process with all other crackers.
5. Once the glue is dry gently pinch together each end about 2cm out from the cardboard roll, and tie with string. If you want to add a small gift tie one end, slide the gift into place, then tie the other end.

Paper Star Christmas Ornaments
There are so many different ways to make Christmas ornaments, but I couldn’t resist combining my love of paper and wax seals to create something special. If you have pets or small children the advantage of these decorations is they aren’t fragile like glass. They can also be customised in an infinite variety of ways, with different papers, stamps, glitter or ribbons.
Materials needed for Paper Star Christmas Ornaments
Pretty papers (like my vintage handwriting paper printables)
Lightweight twine, cord, ribbon or string
Glue stick
Scissors
Cardboard (old cereal or mailing boxes work well)
Sealing wax and stamp
Hole punch
How to make Paper Star Christmas Ornaments
1. Cut a star approximately 11cm wide from your cardboard, or use choose one of the medium stars from my free printable template.
2. Cut smaller stars with a variety of numbers of points from your decorative papers. In the example I’ve used the vintage handwritten documents printable combined with the printable template.

3. Layer the smaller stars and glue onto the cardboard base.
4. Punch a hole through one of the points of the cardboard star and tie a loop of string.
5. Melt some wax and create a seal in the centre of each star.

DIY Star Christmas Tree-topper
A star on top of the tree is the perfect way to finish off your DIY decorating.
You can watch a short video on how to make this project on Instagram here.
Materials needed for Star Christmas Tree Topper
Pretty papers (like my vintage handwriting paper printables)
Lightweight twine, cord, ribbon or string
Glue stick
Scissors
Cardboard (old cereal or mailing boxes work well)
Metal paper fasteners
Cardboard tube (toilet or kitchen towel roll core work well)
How to make Paper Star Christmas Ornaments
1. Cut a large star approximately 22cm wide from your cardboard, or use the whole-page star from my free printable template.
2. Glue the cardboard to a large piece of decorative paper, then trim off the excess paper to neatly match the edges of the cardboard.
3. Cut smaller stars with a variety of numbers of points from your decorative papers. In the example I’ve used the vintage handwritten documents printable combined with the printable template.

4. Layer the smaller stars and attach them to the large star using a metal paper fastener. Depending on how sharp your fastener is you may need to poke a small hole through the paper and card in the centre. If you don’t have a paper fastener you can simply glue the small star in place.
5. Trim a paper roll to a size the will be hidden behind your star. Attach it to the back with glue, taking care to position it so that it is pointing the same direction as you want your star to appear. I used a stronger PVA glue for this step.
6. Use paper clips or pegs to hold the paper roll in place while it dries.

And so your paper Christmas decoration projects are complete! If you’d like to see videos with more detail about how each of these decorations were made follow @mina.and.maud on Instagram.
